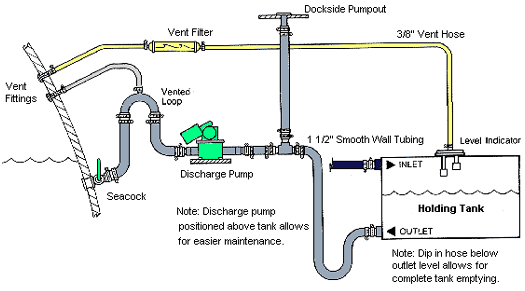
Fittings will be located per customer’s specification with 3/8″, 1/2″, 3/4″, 1 1/4″, 1 1/2″, 2″, or 3″ threaded inlets and outlets.
The material will be Linear Low Density Polyethylene.
The markings will include RONCO and the stock number of the tank.
RONCO MARINE TANKS should always be stored out of direct sunlight and protected from freezing. Prior to installation, tanks should be at room temperature for a minimum of six (6) hours. The tank must be installed on a flat or contour matched surface, be clean and totally supported in all planes with 1/2″ – 3/4″ marine plywood or equivalent.
Install tubing and fittings so that there are no points of stress on the tank. Use elbows to prevent partial bending or collapsing of the tubing when a change in direction is required.
When working with threaded plastic fittings be sure to use a proper sealant. The correct sealant for threaded joints is non-hardening, compatible with plastic and should not slip. A non-hardening compound is forced by water pressure into potential points of leakage, thereby performing a true sealing function. If the tanks are for water, make sure the sealant used is water safe.
Following the application of proper sealant, hand tightening will provide an adequate seal. On occasion, a slight tightening with a wrench may be required. To avoid damage to seal fittings, do not apply excessive force. Do not exceed 1/4 turn after hand tightening.
Do not install metal fittings in the plastic tank as the materials are not compatible.
Should you desire to test the potable water tank or water system for leaks, fill with water and check visually.
